This chapter covers the normal mode of Twilight Princess for the Nintendo Wii. If you are playing on the Nintendo Wii U, check out the Lake Hylia: Sidequests – HD Version.
- Chapter 1 – Ordon Village
- Chapter 2 – The Twilight
- Chapter 3 – Faron Woods: Twilight
- Chapter 4 – Forest Temple
- Chapter 5 – Kakariko Village: Twilight
- Chapter 6 – Death Mountain
- Chapter 7 – Goron Mines
- Chapter 8 – Lanayru Province: Twilight
- Chapter 9 – Lake Hylia: Sidequests
- Chapter 10 – Lakebed Temple
- Chapter 11 – The Master Sword
- Chapter 12 – Gerudo Desert
- Chapter 13 – Arbiter’s Grounds
- Chapter 14 – Scaling Snowpeak
- Chapter 15 – Snowpeak Ruins
- Chapter 16 – Sacred Grove: Round Two
- Chapter 17 – Temple of Time
- Chapter 18 – In Search of the Sky
- Chapter 19 – City in the Sky
- Chapter 20 – Palace of Twilight
- Chapter 21 – Cave of Ordeals
- Chapter 22 – Hyrule Castle
9.1 Lake Hylia Bugs and a Heart
Now Lake Hylia is a lot more relaxing with the calming music. Walk over to Fyer, who is the guy running the shop in the center of the Lake known as Fyer and Falbi’s Watertop Land of Fantastication. He’ll make an offer to you for only 10 rupees. Agree to it, walk inside, and he’ll send you flying to a higher area within Lake Hylia.


Once you land, walk into the building and climb down the ladder. Walk to the open area and speak with Falbi, a weird looking clown. He’ll welcome you to the Flight-by-Fowl mini-game. Agree to pay the 20 rupees and he’ll tell you to grab a Cucco. Be sure to save your game here just in case you mess up as it is costly to get back up here.
Grab one of the cuccos by slowly walking up to them and then return to Falbi. You basically just jump off the cliff and use the cucco to slowly float to the ground of Lake Hylia. Pressing forward will cause Link to speed up while holding back will slow you down. Walk to the edge and look down into the lake. You’ll notice a new building in the center of the Lake. There are several tiers where Link can land. We are aiming for the 2nd tier from the top. The top tier that is rotating around will lead to a treasure chest containing an orange rupee, which is worth 100 rupees. If you do happen to land on the top tier, since it is rotating, it is difficult to drop down to the 2nd tier. The 2nd tier, or the first one that is not rotating also has a treasure chest, but this one contains a Heart Piece.

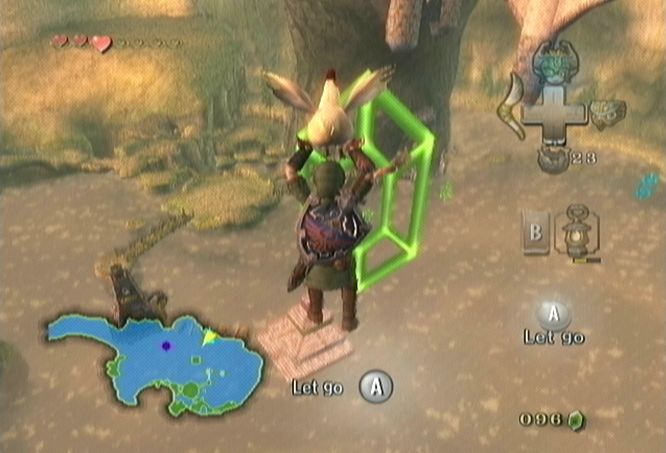
There are rupees all around, but don’t bother with them as they aren’t worth the cost to get up here. Just jump straight ahead and immediately pull all the way back so you are not moving forward at all. Slowly but surely drop lower and lower, pushing forward very slowly. As you approach the building, try to land on the 2nd tier area. It really isn’t too difficulty and you should get it on your first or second try. Open the chest here to get a Piece of Heart.
Fall down to the areas below and open the treasure chests to get some extra rupees. At the third chest, you’ll see a lantern moving around and a creature laughing at you. This is actually a Poe Soul, which will be another extra thing to collect, but we can’t do so until later in the game. Walk back over to Fyer and pay 10 rupees to shoot back up to the sky.
Climb down the ladder again and this time, leave the house through the door. You are actually at an area we were just nearby as Wolf Link. However, now that we have returned to human Link, there are a few golden bugs we can find. Walk along the path and you’ll find some horse grass. Call over Epona and then ride her over to the Great Bridge of Hylia.

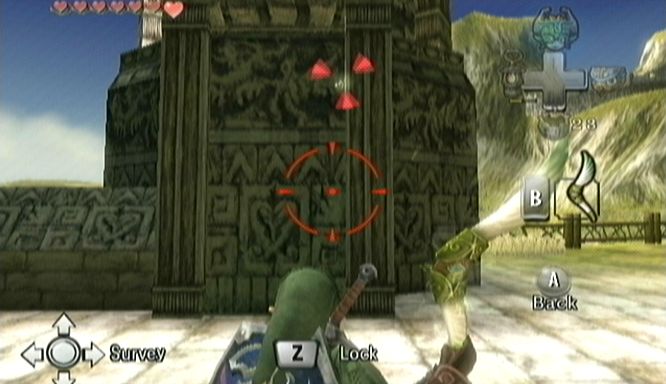
Defeat the various Bokoblins that are in your way. Once you first reach the bridge, jump off Epona and look around to see a golden bug flying around. Usually it is against the west arch but it flies around. Use the gale boomerang to bring it near Link and grab it to get the Male Mantis.
Jump back on Epona and ride her to the south end of the bridge. You should be getting a letter or two from the Postman at this point. One of them is from Barnes about a new water bomb available, and the other just states the different tourist attractions in Lanayru. Once you reach the end of the Great Bridge of Hylia, look above and you’ll notice you are under a massive tree. Travel to the other side of it and then turn around. On the east side just under the trees roots, you will be able to see another golden bug. Use the gale boomerang to pull it over and capture the Female Mantis.


Also in this area you will see two variations of a new enemy, the Chu. There is a red Chu and a blue Chu on the ground moving around in this area. Both can be easily defeat using Link’s sword. Once defeated, Link can scoop up the jelly that is left to get red or blue Chu Jelly. The Chus have the potential to merge into one, at which they become purple Chu.
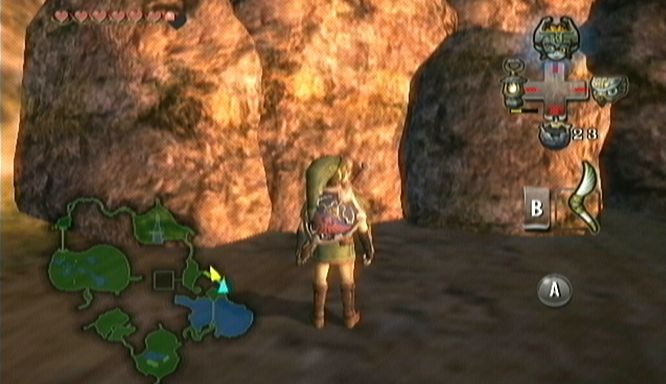
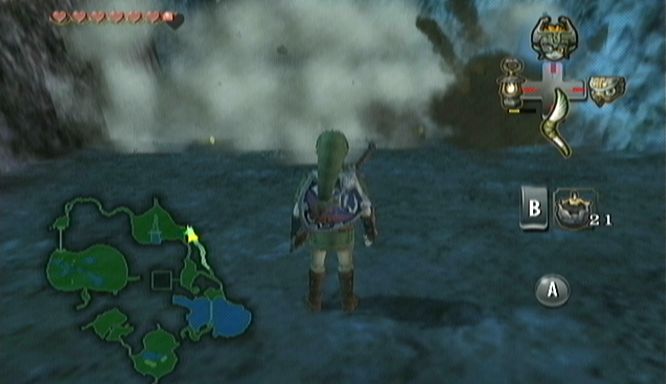
Jump back onto Epona, ride back across the Great Bridge of Hylia, and head up the path to the north. There is fork in the road straight ahead. Take the path on the right and you’ll see a bunch of boulders. Jump off Epona and break these boulders with some bombs. Jump back onto Epona and ride through this area. At the end of the path you’ll reach another section blocked by boulders. Jump off Epona once again and use your bombs. Jump back on Epona and ride into the north part of Hyrule Field.
9.2 Zora's River Games
Stay against the wall at the northern most point here. Continue running forward and you’ll reach a few forks in the road. Always take the north routes until you reach a few more boulders that are in your way. Jump off Epona and blow them up. Epona won’t be able to ride over the debris so get off of her and just walk northward to get to Zora’s Domain.


Jump down into the water below and swim to the west land area. Climb onto the land and walk up the platform. Along the wall on the west side of the area you’ll see a golden bug. Walk over and grab it to get the Male Dragonfly. Jump back into the water and swim to the east side. Walk along the path and head down to get to Upper Zora’s River.
Walk to the far north section of this area and you’ll see a door. Enter it to find the Fishing Hole. This place can be quite entertaining and you might see yourself spending some extra time here. For now, just walk along the path to the west that borders around the pond. Keep going until you reach a sign that says ‘Don’t Litter’. Specifically it says, ‘Do NOT toss empty bottles or cans here!’ Hmm, you know what that means. Pull out your fishing rod and toss it into the water that is northwest of the bridge. Just fish normally and you’ll probably catch a few greengills. Just keep fishing and eventually, you’ll catch an Empty Bottle! Awesome! Cleaning the pond and gaining a bottle at the same time, great.


Walk to the southeast corner of the Fishing Hole and enter the building. Speak with Hena, the owner of the Fishing Hole. Hena is actually the sister of both Iza and Coro. Pay the 20 rupees and you’ll next appear inside of a canoe. You’ll also have the lure rod and Hena herself as a guide. Before beginning any fishing, paddle northward and you’ll see a huge rock which you can paddle underneath. If you look closely you’ll notice a Heart Piece on top of the rock. Paddle close to the rock but not too close. Pull out your fishing rod and aim towards the Heart Piece. Press and hold A and then lift the Wiimote back. Then at the same time, quickly pull the Wiimote forward while releasing A. This will toss the lure out ahead. Try to hook on the piece of heart and then rotate the Nunchuck to real the fish in. Hena will allow you to keep it.


You can continue fishing here to find all sorts of different fish and earn different goodies. However, the rewards from here are limited to just rupees and a picture. Once you are ready to go, talk to Hena and call it quits. Leave the house and then leave the fishing hole.
Walk over to the building at the far west portion of this area. If you talk to Iza here she says the place is closed. No worries for now as we’ll deal with that in just a second. For now, just walk over towards the door and turn to face the water. You’ll see a golden bug fluttering around. Use the gale boomerang to bring over the Female Dragonfly.
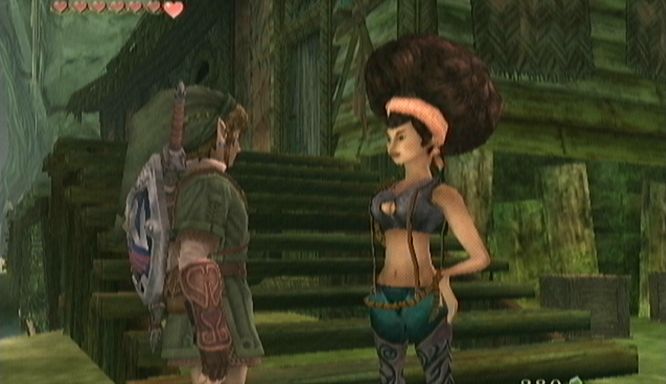

Walk back over to the north side of the river and a wall of twilight appears along with three shadow beasts. Defeat one of them with basic sword attacks and then use the spin attack to defeat the other two. They will return to the sky and a warp portal is now opened for Link. Iza, the scared woman nearby, is impressed by Link and wonders how he keeps his cool fighting monsters. She then invites you to come inside.


You’ll find out that she used to rent boats, but since the river was blocked by boulders, she no longer is able to do so. Offer to help and she’ll lend you a bomb bag. Use bomb arrows to explode the boulders that are in the way. Two shots will do the trick. She’ll have you hop into the boat and ask to take care of the other boulders that are blocking the path. She’ll let you keep the bomb bag after you make it to the bottom.


In your boat, the river will carry you through and your paddling will keep you on course. Paddling could be a bit tricky but almost anything you do run into doesn’t really do much except take you off path. Just try to keep the boat going straight down the river until you reach a Zora at the very bottom. The Zora here is an assistant to Iza.
There are boulders straight ahead that are affecting the flow of the river. Just use some bomb arrows to blow up these rocks. Once those are blown up, she’ll guide you down to the bottom of the river. She’ll drop rupees behind her, but if you are as bad as me when it comes to controlling the boat, you’ll miss almost all of them. Finally you’ll reach Lake Hylia.


You’ll appear on land and the Zora will tell you to keep the Bomb Bag. She’ll then swim off, hauling the boat with her. Run back over to Fyer and pay him 10 more rupees to get shot back up to the higher area of Lake Hylia. Leave the house like before and run over to the horse grass. Call over Epona and hop on. At this point, you can travel the long way to get back to Iza’s boat rental shop once again. A new game is in place that will reward you with a larger bomb bag. It is a bit inconvenient right now, as it is a long distance away. Later in the chapter, there is much more convenient time to play the game. Instead, just ride westward to get to the east gate of Castle Town.
9.3 Hyrule Field Goodies
Remember the golden wolf location? It is just north before you get on the bridge, check out the map if you are lost. Climb up the vines toward the wolf and once again you’ll be taken to a foggy area with a mighty warrior. The new skill that is learned is the Back Slice. Before trying to learn the new attack, you must prove that you have mastered the shield attack. Swing the nunchuck forward to perform the shield attack and then slash at him. To perform this attack, Z-target the warrior and make two dashes to the left or right, and then perform a sword attack to slash at its back. After Link learns the back slice, jump back on Epona.


Follow a path that heads southward a bit and you’ll see a group of flowers on your left. Jump off Epona and catch the golden bug that is fluttering around over here. This is the Male Butterfly. Jump back on top of Epona and ride her all the way up to North Hyrule Field.


Follow the path to the west until it splits. You should see a tree straight ahead with a golden bug sitting on the trunk. Use the gale boomerang to bring it over and catch the Male Stag Beetle.


Jump back on Epona and ride northward as if you are heading towards Zora’s Domain. Instead of heading north at the fork in the road, head south. Follow the path and it will open up a bit and a Tektite will be hopping around. Dismount from Epona and defeat the enemy. You can easily defeat the bouncy creature with a few sword slashes. Look at the wall on the north and you’ll see an odd looking boulder in the wall. Just above this boulder, you’ll see a golden bug. Use the boomerang to pull it over and capture the Female Stag Beetle.


You can use a bomb to blow up the boulder to here for future reference, but we cannot accomplish what is inside this hidden cave just yet. Jump back on Epona and ride her to the east portion of Hyrule Field. From here, ride over to the eastern gate and dismount from Epona. Walk into Hyrule Castle Town.
9.4 Lots to do in Castle Town
On the east side of town, walk to the west a bit and you’ll see a man standing at the side of the path. This man is named Charlo and he’ll ask you to make a donation. Donate all the rupees you can afford. No worries because we are about to get a ton of rupees for exchanging all these golden bugs that we’ve accumulated. When you eventually have donated 1,000 rupees to this man, you’ll be rewarded with a piece of heart.

Speaking of those golden bugs, there are still two more we can get right now. Run to the south end of town and exit through the south gate. Walk to your left and down the steps. The golden bug flutters around near the steps that are by three trees. Grab it to get the Female Ladybug. This bug does tend to fly around a bit and can be difficult to catch. You most likely need to use the gale boomerang from a distance since it will fly away if you try to get close to it. If it goes out of sight just walk away and return and it should fly back.


Once you’ve caught the female ladybug, the male one awaits at the west side of the field. There is a mesa sticking out of the ground and a ton of crow like enemies known as Guays floating around. The bug is usually sticking on one of the sides of the mesa. Defeat the Guays and then use the gale boomerang to recover the golden bug.


There is a boulder just northeast of the mesa. You can blow it up to get a bunch of rupees. Also, there is a Goron at the south end of the field who is in need of hot spring water so he can break down the blocks in the way. Don’t worry about him for now and just re-enter Hyrule Castle Town.
Back in town, walk forward and make a quick right. Walk down this path and first place you’ll see on the left is the Fortune-Telling Mansion. You can enter to meet up with Madame Fanadi, the fortune teller.


The next place on the left is Agitha’s Castle. This is actually where we will be trading in all those precious golden bugs. Enter the building and walk around to speak with Agitha. Speak with her and you’ll find she is overly in love with bugs. She invited 24 golden bugs to the ball, but none of them have shown up. She asks you to bring them to Agitha’s Castle if you have them. Speak to her once again and show her one of the 19 bugs that you have already caught. She’ll be so happy that she gives you the Big Wallet, which now allows Link to hold 600 rupees! Next, give her the pair golden bug and you’ll be rewarded with 100 rupees.
Repeat this process and show her another bug, then another, then another, etc. It is actually a rather tedious process. Why can’t we select 5 bugs at once?! Basically, she’ll give you 50 rupees for the first bug, and then 100 rupees for its pair. Keep giving her bugs until you are close to the full 600 rupees in your big wallet. At that point, leave the building and run over to the guy in the east part of town who was asking for donations. Give him 50 rupees at a time until you’ve given him almost all the rupees that you have. Again a tedious process, why can’t we just give him 600 rupees at once!?
Once you’ve donated all that you have, return to Agitha’s Castle and show off more of the golden bugs that you’ve found. Once you are about to hit 600 rupees again, leave the place and return to Charlo, the man that accepts donations. With the 19 bugs that you have, that should give you 1400 rupees in total. That is enough to make 1000 in donations and have plenty of rupees left over. After the 1000 rupees have been donated, a Piece of Heart will fall from the sky.
You can save a few golden bugs for now as you might want the rupees later on. We’ll be getting plenty of rupees in the next temple so there is no need in getting all these extra rupees now. Run back to the south end of town and walk over to Telma’s Bar. A cut scene will play and Link will now be properly reunited with Ilia. Ilia, however, is very upset since the doctor was unable to help Prince Ralis, the struggling Zora. Telma mentions that the shaman in Kakariko Village has been known to treat Gorons and Zoras. Of course, Telma is referring to our friend Renado. The guards in the bar will cowardly back down and Link is apparently the only man that can take them to Kakariko Village. You will find out that Ilia is having a memory problem and also, it was her who brought Prince Ralis to the bar.


After a flash, you’ll be at a portion of Hyrule Field, looking over at the Great Bridge of Hylia. The bridge to the west is destroyed and the south is blocked by rocks, so the only way to get Kakariko Village, is by passing across the Great Bridge of Hylia. Unfortunately, it appears that King Bulblin has resurfaced and is patrolling the bridge.


9.5 Journey to Kakariko Village
You’ll then be taken to the east part of Hyrule leading towards Lake Hylia. Telma and Ilia will be in a horse and carriage. Lead the way towards the Great Bridge of Hylia for another battle with King Bulblin. Once you arrive, you’ll notice that King Bulblin now has an extra shield of armor, making him invulnerable to regular sword attacks. However, Link has also gained a new weapon, the bow and arrow.


The battle is similar to the one that took place on the Bridge of Eldin. While riding towards King Bulblin, use the bow and hawkeye to aim an arrow directly at him. Avoid crashing into him and ride over to the other side. Epona will turn around automatically and then ride back towards King Bulblin. A second arrow shot will send King Bulblin crashing over the edge of the bridge and the gate keys will come right towards Link.
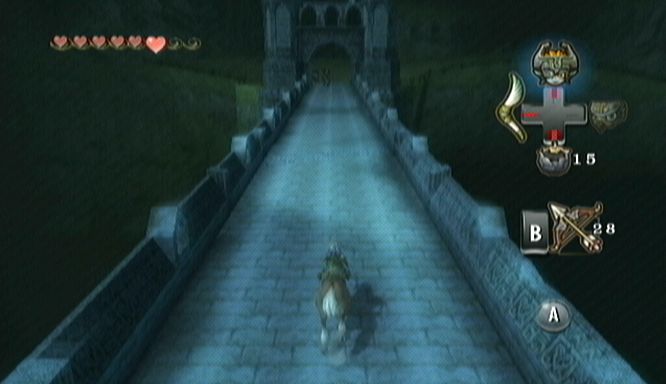

You’ll immediately appear on the other side of the bridge and the quest to Kakariko Village has begun. Bulblin Archers will appear and they will be shooting fire arrows at you, and more dangerously, at the carriage. If they happen to light the carriage on fire, hurry and Z-target the carriage and toss the gale boomerang to put out the fire. You’ll reach a gate at the end of the path here. Jump off Epona and use the gate key to open the gate. Jump back on Epona and continuing riding.


In this portion of Hyrule Field, you’ll see a ton of Bulblin Archers on top of Bullbos trying to shoot fire arrows at the carriage. In addition to this, there will be a Kargorak flying around this area dropping bombs in front of the carriage. If they do drop a bomb below and the carriage runs over it, the carriage will move off its path and do a circle around the field. You must defeat the Kargorak in this area in order to pass. Fight off the Bulblin Archers, defeat the Kargorak, and the carriage should be able to travel westward to the Kakariko Gorge portion of Hyrule Field.


This area is filled with a bunch more Bulblins and another flying Kargorak. A good strategy is simply to get off Epona, defeat the Kargorak first with your arrow and then worry about the Bulblins. Again, the carriage will light on fire, but Link does have some time to diffuse it. Once all the enemies are out of the way, open the gate and head into Kakariko Village.


9.6 Zora Armor and More
The next we see, Link is speaking with Colin and Renado. Renado says the worst has passed and that the Zora prince should recover in due time. After some chat with Renado and Colin, Telma will finally formally introduce herself. She says she wants to see Link back at her bar to speak with the group that is trying to help Hyrule. Link will then see an image of Queen Rutela. Follow her spirit as she floats over to the Kakariko Graveyard.


Walk to the back of the graveyard and you’ll see a gravestone disappear. The grave had the image of a Zora Sapphire. Crawl through the hole and on the other side you’ll find King Zora’s Grave. The Queen will open the grave and underneath Link will find the Zora Armor. Wearing it will allow Link to move freely through the water. The Queen’s final words to Link are to tell his son of his mothers passing, and that she loves her child.


Midna will appear and re-utter that you must get the final fused shadow. Swim over to the hole and crawl back to the other side of the graveyard. Leave the graveyard and head back to Kakariko Village.
Walk to the north end of town and enter Barnes Bombs. Walk over to the carpet that is on the left side of the counter and speak to it. Barnes will run over here and talk to you. This is the buyback counter. Link needs to sell the bombs in one of his bags in order to purchase the new water bombs. Sell the bombs in whichever bag you have fewer bombs in. Then walk over to the other side of the counter and Barnes will have some Water Bombs for sale. You can choose whichever quantity you’d like, but I’d go with the 15 bombs if you have the rupees. Leave the bomb shop.


9.7 The Third Bomb Bag
Note: This section is optional and only obtains the third Bomb Bag. If you are not interested, skip to section 9.8.
Run to the spring and use the horse grass to call over Epona. Our next destination is all the way north at Zora’s Domain. Since the Bridge of Eldin is not crossable, you’ll have to travel all the way around Hyrule to get to it. There is actually a shortcut to get to Lake Hylia in the graveyard. You can use the water bombs at the bottom of the water near the grave of King Zora. You can walk through a cave that leads to Lake Hylia. However, there is something for us to find in Zora’s Domain first. Jump on Epona and ride into the Kakariko Gorge portion of Hyrule Field. From here travel east all the way to the Great Bridge of Hylia and then continue northward all the way to Zora’s Domain
Once you reach the entrance to the domain all the way at the northern most point of Hyrule Field, dismount from Epona and walk northward. Walk straight northward along the path and stay against the wall on the right. Climb up steps and then use your bombs to blow up a boulder that is in the way. Blow up a second boulder and you’ll now be at the top of the waterfall. Walk northward and to reach the chamber where the throne lies.


Equip the Zora Armor and jump into the water. Equip the iron boots to sink to the ground. Use a water bomb on the large rock that Midna brought over from Death Mountain earlier. The water bomb will blow it up and out comes a Goron. I didn’t know Gorons can breathe underwater. As a token of his appreciation for saving him, he will reward Link with a 3rd Bomb Bag. Release the iron boots and swim back up to the surface.


9.8 Entering the Lakebed Temple
Our next stop is Iza’s Rapids Ride where we can get a bomb bag upgrade, as well as make our way towards the Lakebed Temple in Lake Hylia. Make your way over to the Upper Zora’s River and enter into Iza’s shop. It is a good idea to save at this point just incase you mess up. Speak with Iza once again and rent a boat for 20 rupees. Your bomb arrows will be equipped and the goal of this game is to shoot down large pots as you ride through. The yellow pots are worth 1 point while the red pots are worth 2 points. You’ll need to get a total of 25 points out of a possible 30. If you hit a wall or something that is in the way of the boat, you will lose a point. Don’t worry about paddling too much as the river does a good job of keeping you steady. However, it is important not to hit too many walls otherwise you won’t be able to get the 25 points. If you don’t get the 25 points and you saved your game, just reset to return to the top of the boat rental shop, which will save you time and rupees. If you do hit at least 25 points, the Zora helper rewards you with the Giant Bomb Bag. This holds twice as many bombs as an ordinary bomb bag. While it appears to be only one bomb bag that you get, it actually doubles both bomb bags that you already have, and any bags you get in the future. You can now carry 60 regular bombs in one bag. Optional: Giant Bomb Bag


If you are not already at Lake Hylia, you can use the water bombs at the bottom of the water near the grave of King Zora. You can then walk through a cave that works as a shortcut to Lake Hylia.
Once you arrive at Lake Hylia swim over the purple dot that is on your map and equip the iron boots. At the lake floor, walk over the far north area. You’ll see a set up bubbles coming out of the ground. Place a water bomb on this and a water geyser will appear. Place a second water bomb and the geyser will carry it upwards. The bomb will explode at the top of the geyser and take a boulder away with it. Swim through the hole and enter into the Lakebed Temple.


- Chapter 1 – Ordon Village
- Chapter 2 – The Twilight
- Chapter 3 – Faron Woods: Twilight
- Chapter 4 – Forest Temple
- Chapter 5 – Kakariko Village: Twilight
- Chapter 6 – Death Mountain
- Chapter 7 – Goron Mines
- Chapter 8 – Lanayru Province: Twilight
- Chapter 9 – Lake Hylia: Sidquests
- Chapter 10 – Lakebed Temple
- Chapter 11 – The Master Sword
- Chapter 12 – Gerudo Desert
- Chapter 13 – Arbiter’s Grounds
- Chapter 14 – Scaling Snowpeak
- Chapter 15 – Snowpeak Ruins
- Chapter 16 – Sacred Grove: Round Two
- Chapter 17 – Temple of Time
- Chapter 18 – In Search of the Sky
- Chapter 19 – City in the Sky
- Chapter 20 – Palace of Twilight
- Chapter 21 – Cave of Ordeals
- Chapter 22 – Hyrule Castle


