- Chapter 1 – Mercay Island
- Chapter 2 – Temple of Fire
- Chapter 3 – Ocean King Part II
- Chapter 4 – Temple of Wind
- Chapter 5 – Ocean King Part III
- Chapter 6 – Temple of Courage
- Chapter 7 – Ghost Ship
- Chapter 8 – Ocean King Part IV
- Chapter 9 – Goron Temple
- Chapter 10 – Temple of Ice
- Chapter 11 – Ocean King Part V
- Chapter 12 – Mutoh’s Temple
- Chapter 13 – Ocean King Part VI
11.1 Temple of the Ocean King V
Now that we have Bombchus and the Grappling Hook there are a lot of extra goodies for us to collect in the early options of the Temple of the Ocean King. There is something new on almost every single floor. Additionally, there are now some shortcuts, so you can get a better time at the half-way point of the Temple if you’d like. Nevertheless, if you’d like to skip ahead, you can walk into the yellow portal and immediately return to Floor B7.
There is nothing new in this room, so continue onward to Floor B1.
Once you arrive at Floor B1, just to the left of the entrance, there is a wooden peg, and another wooden peg across the gap. Use the Grappling Hook to create a tightrope and walk on top of it. While on top of it, use your Bow and Arrow to shoot the eye switch. This causes a treasure chest to appear at the southeast corner of the room. Wait for the Red Phantom on the right side to be heading downward and then quickly run over to the right. Open it up before it disappears to get a Courage Gem.Optional: Courage Gem #17


There is nothing else to do in this room. So use bombs at the north side of the room to quickly get the key at the northwest corner. Go down the steps to get to Floor B2.
Run straight downward and use a bomb to blast open the wall. Like before, we still need to hit the two crystal switches in this room, causing a small key to appear. When the path is clear, be sure to grab the small key. For the next trick, it’s a good idea to pull the lever that is right behind where the Blue Phantom is, as it will allow for an easier pathway.
At the west end of the room, just west of the locked door, toss a bomb against the northern wall to allow passage into the safe zone. From here, there is a small hole at the northwest part of the room where you can send a bombchu through. Hit the switch with a bombchu and a treasure chest appears at the east end of the room. Quickly run over and open it up to get a Wisdom Gem.Optional: Wisdom Gem #16


We no longer need to collect all the Force Gems in this room as there is a new secret path. However, it is still beneficial for us to collect the Small Key from the Phantom as we can use it on a later floor. Stand in the safe zone and wait for the nearby phantom to come by and shoot it with an arrow to stun it. Then shoot a second arrow at the phantom with the key and run over and pick it up.
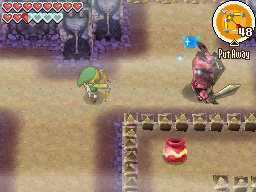
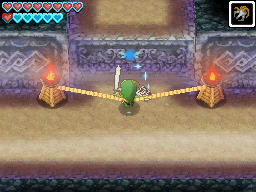
Run to the northwest corner of the room and you’ll a pair of torches. Stand above the torches and use the Grappling Hook to create a tightrope between them. Now use the rope to slingshot yourself up to the higher ledge. Run on through to reach the safe room. Be sure to break the yellow pot for some extra time and then continue down the steps to get to the next floor.
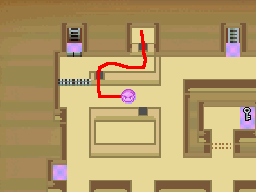
Floor B4 has some more substantial changes. Run to the northeast corner of the room and shoot the eye switch, causing all the wind geysers to go out. Now make your way to the northwest corner of the room and get rid of the Phantom Eye. Break the red pot to create a safe zone. From here, use bombchus to get through the various small holes in the ground, hitting crystal switches. One of these will lower the spikes so you can reach the small key, while the other will allow you to reach a new door that we previously have not gone through at the northwest corner of the room. Grab the small key and head through that door.
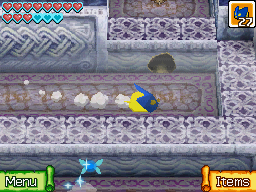

Once you arrive on this floor, you can jump with the wind geyser and quickly make it down to the next floor. However, there is a Treasure Map for us to collect.
Use the shovel to dig up the soil spot, causing a wind geyser to appear. Hit the crystal switch and open the large treasure chest to get the Treasure Map.Optional: Treasure Map #23


There is nothing new on this floor, so quickly run over to the red door. If you’d like, you can draw the Hourglass symbol and enter that room to find a yellow pot with some extra time. Then return to the door and draw the Triforce symbol once again to progress onward. If you step into the yellow portal, this will save your new time, presuming it took you less time to reach this portion of the Temple.
Ride the platforms to the north end of the room and step into the safe zone. From here, use the Grappling Hook on the treasure chest to get across. Open up the treasure chest to get the Round Crystal. Note, if you got that extra small key from Floor B3, you can simply use that small key here on the locked door at the northeast corner of the room and head down to Floor B8. If not, you will have to use the staircase at the southeast portion of the room.

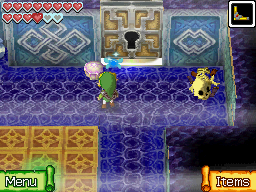
Just to the right of the safe zone at the north part of the room, you’ll find a wooden peg. Jump on top of it and use the boomerang to hit the switch found to the southeast. This will cause a treasure chest to temporarily appear. You want to hit it when the nearby Red Phantom is walking to the bottom portion of the screen. Run over to the treasure chest and open it up to get a Power Gem.Optional: Power Gem #17


We no longer need to traverse to the west side of this room. We still need to hit a switch located on the east side of the room but because there is a small hole that a bombchu can fit through, we can avoid dealing with the crystal exchange all together. Trace a path with the bombchu through the small hole to hit the crystal switch. Then carry the Round Crystal down to the floor below.
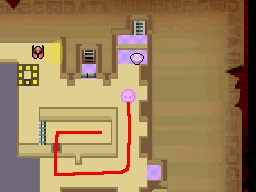

The floor hasn’t changed much and we still need to collect all three of the crystals. Take the Round Crystal and place it near the door at the top-middle of the room. Beware of the Wizzrobes, defeat all four of them to get some extra time in your hourglass.
We need to get the Square Crystal from the Phantom here. While you can mess with the eye target at the south end of the room and the trap door, the easiest way to get the crystal is to simply shoot an arrow at the Phantom’s backside. The Phantom will be stunned momentarily and will drop the crystal. Run over and grab it and carry it to the northwest corner of the room.
Place the Square Crystal in the pedestal to lower the flames and open the nearby treasure to get the Triangle Crystal. Now carry all three crystals to the north end of the room.
In order to progress, you have to place the three crystals into the pedestals in the proper order.
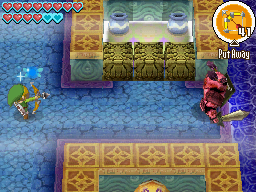

- Place the Square Crystal First.
- Place the Round Crystal Second.
- Place the Triangle Crystal Last.
With all three crystals placed in order, head through the door above and the whole floor will shake. Due to the order you placed the crystals, this room now serves as an elevator. Once you leave the room, you will be down at Floor B10.
You could have actually made it by the next few floors during our last visit through the Temple of the Ocean King. However, now that we have both the Grappling Hook and Bombchus, this floor becomes much easier to navigate. This floor also introduces Gold Phantoms. If you are spotted by a Phantom or a Phantom Eye, all of the Gold Phantoms will warp over to your location immediately.
From the safe zone, use a bombchu and set it through the hole that is nearby. Trace a path downward and hit the crystal switch that is here, causing some spikes to be lowered. It is also a good idea to trace a path and get rid of the two Phantom Eyes that you can reach.
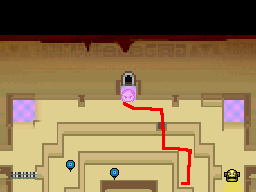
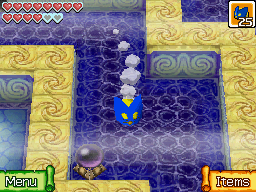
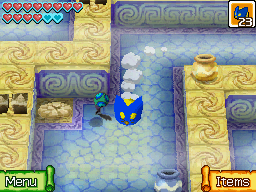
Next we want to defeat both of the Gold Phantoms. Wait until the Phantom on the right of the room starts walking downward and then run over to the northeast corner of the room. Jump on top of the wooden peg and then use the Grappling Hook to make your way over to the safe zone. Push the large boulder downward and it will roll off the ledge and it will destroy the Gold Phantom if he’s in the path. Now run over to the northwest portion of the room and use that boulder to defeat the second Gold Phantom.

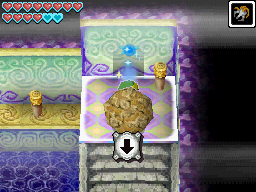
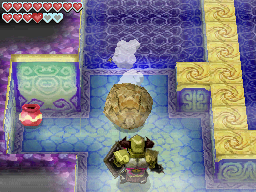
With both Gold Phantoms defeated, a treasure chest will appear. Be sure to run over and collect the small key that the Phantom had dropped. At the southwest corner of the room, you can break the red pot to create a safe zone. From here, you can launch another bombchu through the small hole, defeating the Phantom Eye if you haven’t already. However, we also want to hit the crystal switch found here, as it will cause the spikes to lower.
You can use the Grappling Hook on the wooden peg to reach the safe zone at the south end of the room. Just to the right of this safe zone there is a bombable wall. Blast it open to get to the inner part of the room. Make your way around and defeat any of the lingering Phantom Eyes. Once they are all defeated, a treasure chest will appear on a higher ledge. Return to the south end of the room and jump on top of that wooden peg. Grapple over to the treasure chest and open it to get a Big Green Rupee.
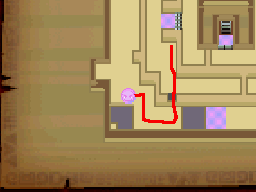

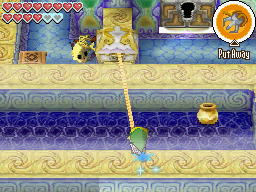
If you defeated both Gold Phantoms, open the treasure chest that had appeared at the west side of the room. Once you have completed everything, use the small key on the locked door and head down to the next room.
This room has two Gold Phantoms and Four Phantom Eyes. I highly recommend getting rid of the Phantom Eyes as quickly as possible. Right away, wait for the phantoms to be at a distance and defeat the Phantom Eyes that are at the Southeast and East sides of the room. Now patiently work your way around the west side of the room and get rid of the two other phantoms. If at any point you get spotted, quickly run to a safe zone. With all four Phantom Eyes defeated, a treasure chest will appear at the northeast corner of the room containing a random treasure.
There are four switches on the higher ledges in this room and we need to step on all of them. However, we have to extend a few bridges in order to reach them. At the northeast and northwest parts of the room, there are two red levers that we can pull. Make your way over and pull both of them, causing bridges to appear at the north side of the room. Pull out your shovel and dig up the soil spot located just north of where we entered the room. Ride the air geyser up and step on two of the floor switches that you can now access.
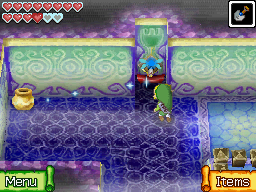

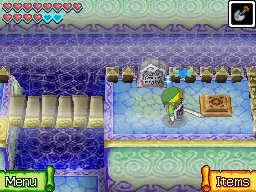
At the southeast corner of the room there is a crystal switch that you can hit, and this will cause a bridge to appear at the southwest part of the room. This bridge is only temporary and you’ll have to move quickly. At the south end of the room, just left of the gap, you can use your shovel to dig up a soil spot to create a wind geyser. Hit the crystal switch at the bottom-right corner of the room and quickly make your way over to the wind geyser. Note: It’s a good idea to keep your distance from the crystal switch and use the boomerang at a range. This will give you an extra second or two.
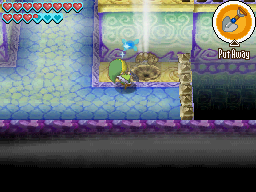
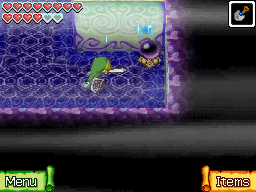
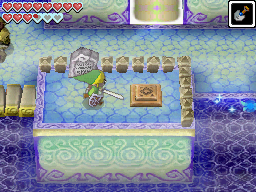
If you get noticed by a Phantom, don’t worry and just keep running. The Phantoms cannot hurt you once you reach the higher platforms. Run over and step on the ground switch at the bottom-left and the bottom-right of the room. With all four switches pressed, head through passage that has opened at the west side of the room.
The goal in this room is to get the three Force Gems and bring them to the large safe zone at the top of the room. Pull the lever found here to lower the nearby spikes and then dispose of the Phantom Eye that is patrolling this side of the room. Make your way over to the northwest corner of the room and open the treasure chest to get a Force Gem. This will cause a Blue Phantom to appear. Wait until he is looking to the west and then make a run for the large safe zone. You can use the red jar that is in this area to create a middle point. When the coast is clear, toss the Force Gem into one of the three spots. Once you place one of the Force Gems, a Wizzrobe will appear. Once it draws near, swipe at it to defeat it and get some extra time in your hourglass.
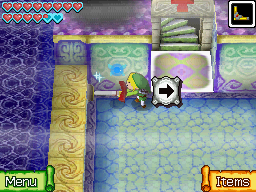
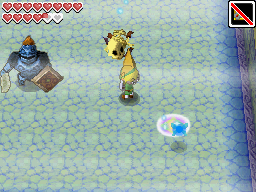
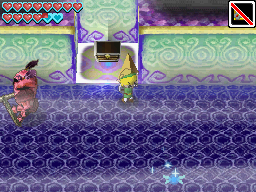
Next we want to make our way to the east end of the room. Carefully head around the corner and get rid of the Phantom Eye. Open the treasure chest at the northeast corner and a Red Phantom will appear. Wait for it to start walking to the left and then quickly make a run for it. Carefully make your way over and place the second Force Gem. If you defeated both Wizzrobes that appeared, be sure to collect the treasure chest that contains a Ship Part.
The Gold Phantom has the third Force Gem, so just carefully wait until it is walking away from you and strike it in the back with an arrow. Run over and grab the Force Gem and bring it over to the safe zone. Place the third gem in its place and head down to the floor below.
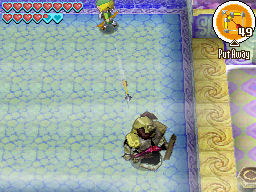
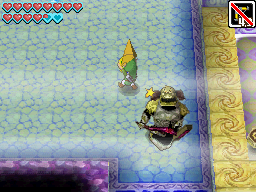
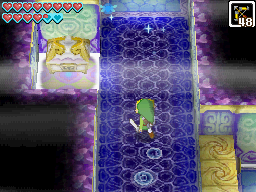
This room is completely empty for the most part. Just drop down below and open the large treasure chest to get the final Sea Chart, which highlights the Northeast Quadrant. Step into the blue portal to return to the entrance of the Temple.

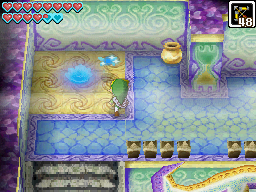
11.2 Northeast Quadrant
There is plenty to do now that we have access to the Northeast Quadrant. However, none of this is required at all. If you’d like to continue onward in the main quest, go ahead and jump onward to Chapter 12.
Return to Harrow Island and play the mini-game. Now that you have access to the Northeast Quadrant, there are two more Treasure Maps to dig up.Optional: Treasure Map #24


Keep playing the Mini-Game until you win the Treasure Map. All together there are four Treasure Maps at Harrow Island, with two of the Sunken Treasures appearing in the Northeast Quadrant.Optional: Treasure Map #25


There is a single Golden Frog located in the Northeast Quadrant. From the Isle of Frost, sail directly northward into the Northeast Quadrant. There are a trio of rocks in this area and the Golden Frog can be found here. Shoot it down with your cannon and be sure to jot the symbol down on your map.Optional: Northeast Golden Frog


Sail over to the Traveler’s Ship in the Northeast Quadrant. Defeat all of the enemies that appear and talk with the Man of Smiles. Speak with him again afterward and he’ll ask you if you’d like the Mysterious or Normal gift. It doesn’t matter what you pick, as the Man of Smiles will always reward you with the Hero’s New Clothes.Trading Sequence: Hero's New Clothes


After clearing the enemies on the Traveler’s Ship, speak with the Man of Smiles and he’ll give you a Treasure Map.Optional: Treasure Map #26


Warp to the Northwest Quadrant and visit the Traveler’s Ship. Speak with the Self-Proclaimed Hero and give him the Hero’s New Clothes. In exchange, he will give you the Telescope.Trading Sequence: Telescope


Warp to the Southeast Quadrant and visit the Traveler’s Ship. Speak with the Ho-Ho at the bottom-left of the ship as he is missing his Telescope. He will give you the Guard Notebook in exchange.Trading Sequence: Guard Notebook


Warp to the Southwest Quadrant and visit the Traveler’s Ship. Defeat the enemies that have come on board and then speak with Nyave. Give him his lost Guard Notebook and in exchange he will give you a Wood Heart.Trading Sequence: Wood Heart


We want to deliver the Wood Heart to the Old Wayfarer. If you go to his home at Bannan Island, he is nowhere to be found. Joanne mentions that he has gone on a journey. Warp to the Southeast Quadrant and you’ll find a second Traveler’s Ship. Make your way over and you’ll find the Old Wayfarer. Speak to him a couple times and give him the Wood Heart. As you leave, he mentions he has something special for you at home. Return to your boat and warp over to the Northwest Quadrant. As you approach Bannan Island, another Giant Eye Plant will appear, which is exactly the same as the one we fought way earlier back at Molida Island. Defeat it just as before and then head over to the Old Wayfarer’s House. Open the treasure chest here to get the Swordsman’s Scroll. This will allow you to perform the Great Spin Attack. Simple draw three circles around in a short period of time and Link will spin away.Trading Sequence: Swordsman's Scroll


If you return to the Man of Smiles, located on the Traveler’s Ship in the Northeast Quadrant, his ship has once again been overrun by enemies. Defeat them and speak with the Man of Smiles. He will reward you with a Prize Postcard. You can deliver this in any mailbox on any island. You will eventually get a reward in the mail, including Treasure or Ship Parts.Optional: Prize Postcard


At the north end of the Northeast Quadrant, there is an uncharted island known as Maze Island. This island is pretty much a giant mini-game where you have to work your way through various mazes in a short period of time, hitting various targets. It’s a rather fun challenge and also has some noteworthy rewards. There is a Beginner, Normal, and Expert mode, where the rewards include a Wisdom Gem, a Treasure Map, and a Heart Container. Once you start the mini-game, the icons will temporarily appear on your map. You should pull out your map and jot these down as they will disappear after a moment.Optional: Maze Island


Regardless of the difficulty level of the Maze, you can venture to the east end of the island, where there is a treasure chest that is easily visible, but it looks like it is impossible to reach. Directly south of the treasure chest, there is a bombable wall. Toss a bomb to blast it open and run over to open the treasure chest to get the Wisdom Gem.Optional: Wisdom Gem #17


Optional: Maze Island Beginner
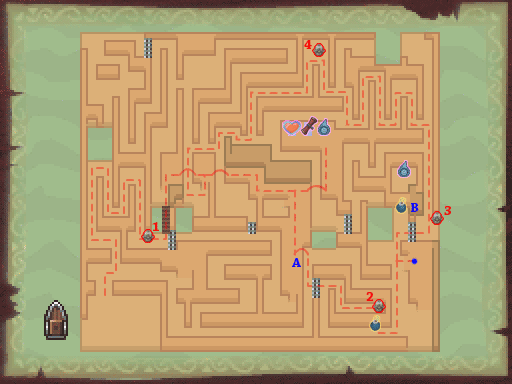


The Wisdom Gem is the prize for completing the Easy pathway at Maze Island.Optional: Wisdom Gem #18


Optional: Maze Island Normal


The Treasure Map is the prize for completing the Normal pathway at Maze Island.Optional: Treasure Map #27


Optional: Maze Island Expert


Sunken Treasure #4 – Northwest Quadrant – Southeast of Bannan Island, the treasure contains a minute of sand for the Hourglass. Sunken Treasure #20 – Northwest Quadrant – East of Bannan Island, the treasure contains a ship part. Sunken Treasure #23 – Southeast Quadrant – Northwest of the Isle of Frost, the treasure contains a minute of sand for the Hourglass. Sunken Treasure #25 – Northeast Quadrant – East of the Isle of the Dead, the treasure contains a ship part. Sunken Treasure #26 – Northeast Quadrant – West of the Isle of Ruins, the treasure contains a ship part. Sunken Treasure #27 – Northeast Quadrant – East of Maze Island, the treasure contains a ship part.Optional: Sunken Treasure
- Chapter 1 – Mercay Island
- Chapter 2 – Temple of Fire
- Chapter 3 – Ocean King Part II
- Chapter 4 – Temple of Wind
- Chapter 5 – Ocean King Part III
- Chapter 6 – Temple of Courage
- Chapter 7 – Ghost Ship
- Chapter 8 – Ocean King Part IV
- Chapter 9 – Goron Temple
- Chapter 10 – Temple of Ice
- Chapter 11 – Ocean King Part V
- Chapter 12 – Mutoh’s Temple
- Chapter 13 – Ocean King Part VI


