- Chapter 1 – Deepwood Shrine
- Chapter 2 – Cave of Flames
- Chapter 3 – Fortress of Winds
- Chapter 4 – Temple of Droplets
- Chapter 5 – Palace of Winds
- Chapter 6 – Dark Hyrule Castle
5.1 Elemental Sanctuary
After completing the Temple of Droplets, leave the Temple and a ghost by the name of Gustaf will appear. He presents himself as a former king of Hyrule and he will mark a location on your map. Ezlo suggests heading on over once you’ve infused your sword from the Elemental Sanctuary.

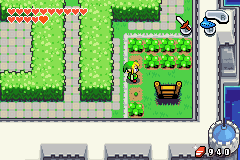
The first stop is at the Elemental Sanctuary, so play the Ocarina of Wind and quickly warp over to Hyrule Town. Run northward to Hyrule Castle Garden where there is a quick goody to collect. Slash your way through the bushes at the southeast part of the garden and you’ll find a secret ladder. Climb down to find a hidden Dojo.
If you haven’t already, collect the Piece of Heart found here. The room is too dark to train with Grimblade, so pull out the Flame Lantern and light the two torches found within the room. Now you can speak with Grimblade to learn the new sword technique, the Sword Beam. The technique is rather simple, when your hearts are completely filled, simply swing your sword to send out a sword beam. After learning the technique, Link will get the Tiger Scroll. Go ahead and exit the Dojo.


Guards are now blocking the main pathway into the Castle, so you’ll have to sneak your way around. There are a series of guards that patrol the west side of the garden, but with careful navigation, you can sneak by them. After getting past the guards, slash away at the nearby bushes and climb down the ladder.


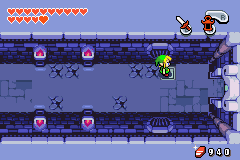
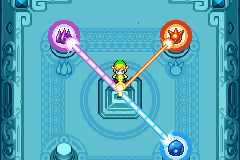
Defeat the ropes and step on the switch at the end of this hallway to open the door. Make your way into the Elemental Sanctuary and once again drop your sword into the pedestal. The power of the Water Element will infuse your blade, which now allows Link to make two duplicate copies of himself on warp tiles! Exit the castle the same way you came in.
At this point you can make your way over to the location that Gustaf marked on your map, however, there are plenty of other goodies to collect. Most notably, there are several Kinstone fusions now available for us over at The Minish Woods. Play the Ocarina of Wind and warp on over to the Wind Crest location.
Once you are in the Minish Woods, shrink down in size and go ahead and enter the Minish Village. Speak to the Minish Elder Gentari and fuse Red Kinstones with him. This will trigger Belari, located just to the west to now start offering a different type of bomb.

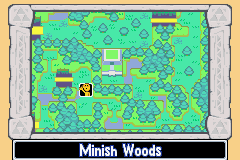
Exit Minish Village to the west and enter the small hut to meet up with Belari. You can now trade in your regular Bombs to get the Remote Bomb. You cannot hold both the regular Bombs and the Remote Bombs at the same time, so you can return to Belari whenever you’d like to trade out which ones you have. A Remote Bomb can be dropped anywhere and it will not explode until Link detonates it. For the most part, there aren’t that many practical uses for the Remote Bombs, but they are a nice addition. It would be nice if you could hold both types simultaneously, but oh well. Link can also fuse Red Kinstones with Belari. This will cause a Treasure Chest to appear within the Wind Ruins.

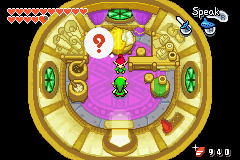
Resize near the Tree Stump and play the Ocarina of Wind to warp on over to Castor Wilds. Dash over to the southwest corner of the area and then head south to enter the Wind Ruins. Make your way through the entire Wind Ruins, just like you did earlier. If you pushed all the blocks earlier, than several shortcuts should have been created. Just before the entrance to the Fortress of Winds, you’ll find the treasure chest that appeared from the Kinstone Fusion with Belari. Open it up to get the Big Bomb Bag! This will now allow Link to carry 99 Bombs! Talk about overkill!
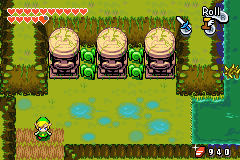
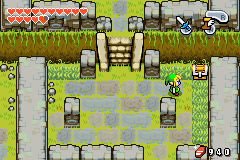
The only other thing I’d recommend doing before making your way to the Royal Valley, is check how many Mysterious Shells you have collected. If you are near the maximum of 999, you should go and trade some in to get some Figurines.
5.2 Royal Valley
It’s now time to make our way over to the Royal Valley. Warp over to Hyrule Town and then exit towards North Hyrule Field. Walk over to the northwest corner of North Hyrule Field and climb down the ladder. Make two duplicates of Link and push the large block to the left, allowing you to pass. Climb up the ladder and then head west to enter the Royal Valley.

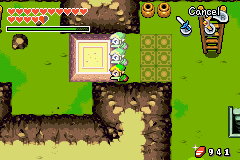
There are a few new enemies that you’ll encounter in this area. The first are these ghost-like Ghini enemies that can be defeated in three strikes. There are also enemies known as Takkuri, which are nearly identical to standard Crows, except they are colored red and will steal rupees from Link if they come into contact with him.
The area is dark, so the Flame Lantern could be of use. Once you climb down the first steps, just to the right there are two pairs of wooden pegs. Blowup a bomb right in between them to reveal a cave. Inside you will find a Great Fairy Fountain! This Fairy will ask you five questions and if you answer them correctly, you will get a reward. The questions and answers are as follows.


- The first element you found was the Fire Element, was it not? – NO
- Your grandfather’s name is Smee, isn’t it? – NO
- Melari of Mount Crenel has seven apprentices, does he not? – YES
- The Blabber Nut gives one the ability to understand the Minish, does it not? – NO
- The robe of the current king of Hyrule, Daltus, is white, is it not?
For answering all five questions correctly, the Great Fairy Fountain will upgrade your Quiver, this now maximizes the size of your quiver, allowing you to hold the obnoxious amount of 99 Arrows!
Continue onward in the Royal Valley and you’ll reach an area where you can travel southward to the Trilby Highlands. No need to go there, so continue northward into the Haunted Forest. Here you will find a maze with each location having a sign, pointing you in the right direction. Defeat the Ghini along the way as you travel, Up, Left, Left, Up, Right, and Up to get out of the Haunted Forest. Going in the wrong direction will take you to a sign-free screen and you’ll have to start over. Going down at any point will take you back to where you entered the Haunted Forest.


Once you exit the Haunted Forest, make your way to Dampé’s House, located at the northeast corner of the area. Speak with Dampé and he will give you the Graveyard Key. As soon as you exit Dampé’s House a Takkuri will appear and steal the Graveyard Key from you.
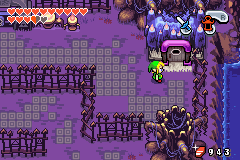

The Takkuri will fly off and land on top of one of the nearby trees. Walk around to find the Takkuri, but don’t get too close. If you do get close, the Takkuri will fly off to a different tree. Instead, once you have the Takkuri in cite, dash into the tree with the Pegasus Boots to knock the key to the ground. Grab the key and then speak to Dampé to gain access to the Graveyard.
Once you enter the Graveyard, speak to the Ghost that is just to the left. Its name is Spookter and after talking to it once, Link can fuse kinstones with the ghost. Fuse Blue Kinstones with Spookter and this will open up a more difficult mode at the Treasure Chest Shop in Hyrule Town.
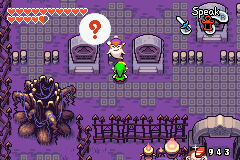

There are a ton of graves in this area, but the one located at the northwest part of the Graveyard can be pushed open. Inside you’ll find Piece of Heart #35. Use the tiles on the right side of the screen, creature two duplicates of Link and push the large block out of the way to reach the heart piece.
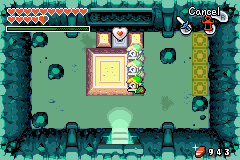

At the north part of the Graveyard there is a large grave and there are three floor switches nearby. Walk over to the southeast part of the Graveyard and break the blocks to find a few colored tiles. Create two duplicate Links and then carefully maneuver around the nearby graves to make your way over to the floor switches. Step on all three and the large tomb will open up, so head inside.

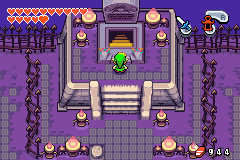
5.3 Royal Crypt
You will find two Gibdos in this initial room. You can defeat these enemies in two ways. One is simply by striking them with your sword. Another way is by burning them with the Flame Lantern, causing them to turn in Stalfos. Defeat both of them and collect some bombs and the small key, and then head up a screen.


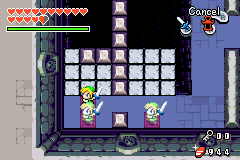
Grab onto the mushroom on the left side and fling yourself across the gap. The two doors on the sides are fake, so head up through the middle door. Walk to the left side and you’ll see some flashing tiles as well as some moving platforms. Use the tiles to make duplicates of Link and then carefully walk onto the moving platform, avoiding the blocks as it moves upward. Step on the floor switches and grab the small key that appears.

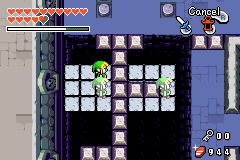

Make your way back across the moving platforms and this time check out the right side of the room. This time there is a green blade trap that moves around the blocks. Once again, duplicate Links using the tiles at the bottom. The best way to get past the spike is to make the final duplicate of Link as the blade trap is moving to the bottom-most block. Step on the switches and grab the second small key that appears.


Use the two small keys on the small blocks in the center of the room and head up a screen. Defeat the ropes and continue up another screen. Use the Flame Lantern to light the four torches and two Gibdos will appear. Defeat them just as you did before and then head up a screen.
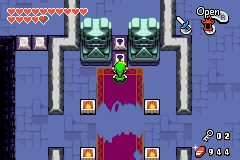

Climb up the steps to the tablet and you will once again see the ghost of King Gustaf. Gustaf will give you a special Golden Kinstone and tells you to seek the source of the flow in Hyrule. Afterwards, you will be transported back to the Royal Valley.


5.4 Kinstone Fusions
After completing the Royal Valley, there are tons of new Kinstone Fusion opportunities that have opened up, some that are right here in the Royal Valley. Earlier we fused kinstones with Spookter, who is on the west side of the Graveyard. You can fuse kinstones with her again and this time she will convince her brother in Hyrule Town to move away from Anju’s Henhouse at the southeast corner of town. We’ll surely explore this area in just a bit.


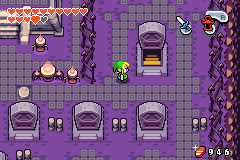
Before leaving the Royal Valley, head inside of Dampé’s House. Fusing Blue Kinstones with him will cause the grave at the northeast corner of the Graveyard to open up. Run on over and enter the gravestone to find a treasure chest containing 100 Mysterious Shells. Inside you will also find a ghost named Gina and you can fuse multiple Green Kinstones with her if you’d like.

Back outside, play the Ocarina of Wind and warp over to Hyrule Town. If you’d like you can shrink down in size using the jar inside the purple building at the southeast part of town. Since the ghost is out of the way you can enter Anju’s Henhouse. Be careful though as the small chicks will try to hurt you. You can climb the chimney to find a Cucco, but all it leads to is a random Green Kinston fusion opportunity.
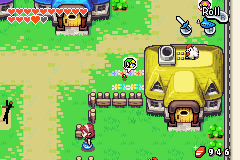
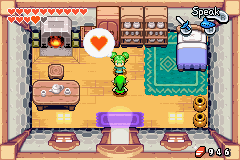
More importantly, there are three new Kinstone fusions for you to complete in Hyrule Town. One with Farore, Nayru, and Din. They will be at different parts of Hyrule Town, depending on which ones have moved into which home. Fusing Kinstones with Farore causes a Joy Butterfly to appear in Castor Wilds. Fusing with Nayru causes a Joy Butterfly to appear in Royal Valley. Lastly, fusing with Din causes a Joy Butterfly to appear in the Wind Ruins.


Navigate your way back to the Royal Valley. You’ll have to once again go through the Haunted Forest to make your way to the butterfly. Once you reach the Joy Butterfly just walking around near it until Link grabs onto it. Collecting this butterfly will permanently cause Link to swim faster!

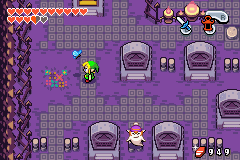
Next warp over to Castor Wilds and walk over to the Joy Butterfly found here. This particular butterfly will allow Link to dig faster with his Mole Mitts. The final butterfly is located just south in the Wind Ruins. Go to the southwest corner of Castor Wilds and then into the Wind Ruins. This Joy Butterfly gives Link the ability to shoot arrows faster.

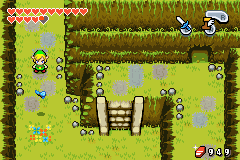
There is one more Kinstone Fusion for us to make right now and it involves one of the Dojo masters. Travel back to the Hyrule Castle Garden and enter Grimblade’s Dojo via the secret ladder at the southeast portion of the area. Fusing Kinstones with Grimblade will cause a waterfall within Veil Falls to open up, allowing Link to swim inside. We’ll head on over there in just a moment. NOTE: You can also fuse kinstones with Waveblade over at the Lake Hylia Dojo, but we cannot yet get the reward, so that will be covered at a later time.
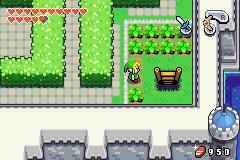
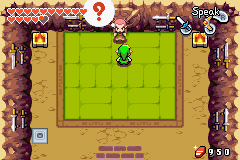
The waterfall that opened up in Veil Falls is along the southern portion of that area. Thus, first travel to Lon Lon Ranch and use the Cane of Pacci at the northwest corner of the Ranch to reach the higher ledge. Travel northward to reach Veil Falls and then jump into the water. Swim into the waterfall to find a secret Dojo.


Speak with the Dojo master Splitblade. This particular Dojo will teach Link how to fill his Split Gauge faster than ever. Link doesn’t need to demonstrate the ability to Splitblade, but rather he is just granted it. When Link charged his sword, the the gauge will now speed up.


5.5 Veil Falls
Make your way to North Hyrule Field and then travel to the northeast to enter Veil Falls. Walk north and you will be able to fuse Kinstones with the Source of the Flow. Use the Golden Kinstone that you got from Gustaf and the stone door will open up.
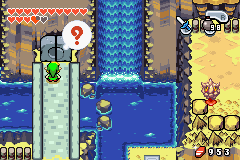

Inside, use the Flame Lantern to navigate this dark cave. Climb up the stairs on the right side and you will encounter a Red Wisp. Use the Gust Jar to suck them in to defeat the enemy. Place a bomb at the top-right part of this room, between the two stones to blowup a secret passage. Inside, open the treasure chest to get some Mysterious Shells and then continue up the stairs.

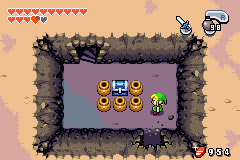
Continue up another floor and you’ll find some large blocks. First off, get rid of the annoying Blue Leevers that are found inside of this cave. Duplicate Link and push the large block downward, allowing you to exit the cave. Outside you will find a treasure chest containing 100 Mysterious Shells!
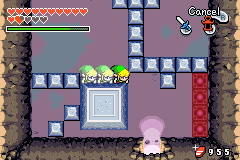

Backtrack to where you fought the Red Wisp and bombed the wall. This time, just exit the cave to the south. Outside, you can take the path southward and at the last soft spot to the south, use the Mole Mitts to dig up a Big Green Rupee!


Climb the large wall to the north and you’ll find a Wind Crest. Be sure to check it out so you can use it as a warp point for the Ocarina of Wind. Then travel northward and enter the cave.
There are several things we can do here. First and foremost, blast open the wall on the right and head inside to collect 50 Mysterious Shells. The staircase at the top-left part of this room just leads to some Rupee Likes for now, so you can collect some rupees, but there isn’t anything useful.
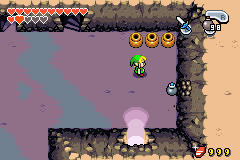

The other staircase, as well as the ladder at the south end of the room both lead to the same place. Just take the staircase and you’ll encounter several enemies. There is also a treasure chest here that contains 100 Rupees! The exit to the left just leads back to the ladder, so instead, take the exit to the right. Climb the wall here and you’ll reach Veil Springs.
Once you reach Veil Springs, you’ll see a massive Goron in the background. We’ll use this Goron later on in our quest to get a special item. Instead, just travel to the west to see a massive whirlwind. Step into this vortex and it will send Link up to Cloud Tops!
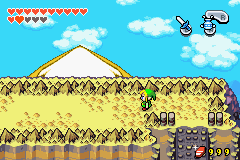

5.6 Cloud Tops
As soon as you arrive at Cloud Tops you can talk to Hailey, a member of the Wind Tribe and she mentions that monsters are all over the Clouds. She hints that you must find some Kinstones. To the right you’ll find another member of the Wind Tribe by the name of Gale. Talk to her if you’d like, but more importantly, you can fuse Red Kinstones with her. This will cause a waterfall in Veil Falls to open up. We’ll be checking out this area a bit later on in the quest.


Next to Gale is a Golden Kinstone. You cannot collect this particular Kinstone, but instead, you can fuse Kinstones with the Mysterious Cloud. You’ll have to find the other half of the stone. Nearby, hope into the red whirlwind and it will send Link flying up to the upper portion of Cloud Tops.
On the upper level, just to the right you’ll find a Treasure Chest. Use the Mole Mitts to dig through the clouds and open the treasure chest to get a Golden Kinstone! Just above the treasure chest there is a hole in the clouds. Fall down to get back to the lower level of Cloud Tops.
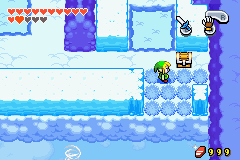

You will encounter a Cloud Piranha here. This is a shark that swims in the clouds, occasionally jumping up to harm Link. You can defeat it with a sword slash when it is in the air or simply avoid it. Walk northward a bit and use another Red Whirlwind to get back up to the upper level. Dig your way to the northeast corner of the clouds here and you’ll find a Red Kinstone! Drop down the hole to the west and you’ll find a Mysterious Cloud. The Golden Kinstone that you previously got will fit perfectly with this cloud, so go ahead and fuse them together!


After the fusion, use the whirlwind to get back up to the higher level. Now use the white whirlwind and fly southwest to another whirlwind, and then northwest to land safely on the clouds. Drop down the hole here. There are two Cloud Piranhas here, so go ahead and doing so. After defeating them, grab the Golden Kinstone that appears and then head up the Red Whirlwind.

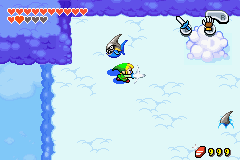
Dig through the clouds to the left and use the white whirlwind to float southwest to another whirlwind. From there travel northwest to the top-left corner of this upper level. Dig through all the clouds here and you’ll find a Green Kinstone at the top-left corner. The two treasure chests at the top area contain 50 Mysterious Shells a piece. Dig southward and open the treasure chest here to get the third Golden Kinstone!
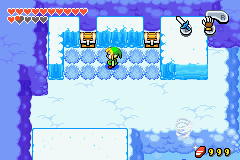
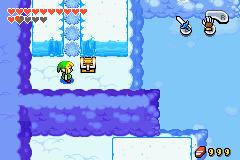
Use the white whirlwind and fly to the southeast. After relaunching yourself from the whirlwind, fly to the clouds to the west. Drop down the hole and make your way northward. You’ll encounter an enemy Lakitu. Use either the boomerang to stun him, or suck in his cloud with the gust jar. After defeating the enemy fuse Kinstones with the Mysterious Cloud to the north.

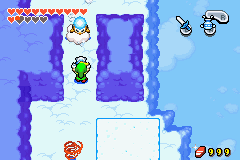
Return to the red whirlwind and get back up to the higher level. Use the white whirlwind and fly yourself southeast. Continue until you reach a third whirlwind and then turn to the southwest. Land safely at the cloud at the southwest corner and then dig your way to the treasure chest to find 50 Mysterious Shells.


Dig through the clouds and you’ll find a Green Kinstone on the west end of the screen. Drop down the hole and defeat some Cloud Piranhas that are here. Travel northward and defeat another Lakitu that is blocking your way. Fuse Kinstones with the Mysterious Cloud that is found here and then travel up the nearby Red Whirlwind.
Open the treasure chest to find the fourth Golden Kinstone. Be sure to dig up the nearby clouds to find yourself a Blue Kinstone piece. Drop back down the hole and then use the red whirlwind to the southeast to get back up to the higher level.
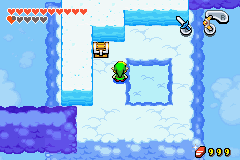

Drop down the hole on the right and you’ll find two more Cloud Piranhas. Defeat both of them and a Golden Kinstone will appear near the top part of this area. Grab the 5th and final Kinstone and then head up the nearby Red Whirlwind.
Open the treasure chest to get 50 Mysterious Shells. Use the white whirlwind to fly directly southward. Dig through the clouds and you’ll find a Red Kinstone piece hiding here. There is a small hole in the clouds and you can use it to drop back down to the lower level. Defeat or avoid the Piranha and head up the Red Whirlwind.
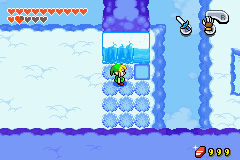

Dig through the clouds in this area to find a Blue and Green Kinstone. Drop down the hole to the left and you’ll find a Mysterious Cloud, so go ahead and fuse Golden Kinstones with it. There is only one more fusion to be made and it is back where we first entered Cloud Tops.
Climb back up to the upper level, using the Red Whirlwind. After digging through the clouds, you can use the nearby whirlwind and travel northwest. Continue along this path and dig through some clouds to find another whirlwind. Fly northeast to the next whirlwind, and then southeast to safely land on the clouds. Drop down to the lower level to get back near the entrance of Cloud Tops.

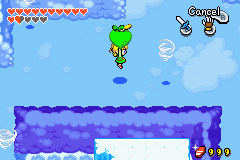
Walk over and fuse kinstones with the final Mysterious Cloud. Now that all five propellers are working, the cloud nearby will disappear and a massive vortex is revealed. Use the vortex to make your way even higher towards the Tower of Winds.
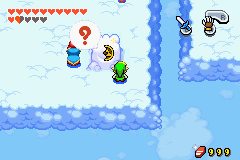
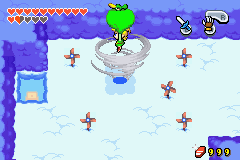
First things first, activate the Wind Crest to make for much easier navigation. In fact, now is a good time to check out that secret inside the waterfall that was activated from the kinstone fusion with Gale. Use the Ocarina of Wind and warp over to Veil Falls.

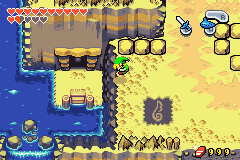
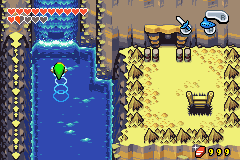
Once you arrive at Veil Falls, jump off the ledge to the west and jump into the water. Swim into the waterfall above and inside you will find Piece of Heart #36! Exit the cave and make your way back to solid ground. Play the Ocarina of Wind and warp back up to Cloud Tops.

This place might look familiar as we traveled here long ago via a shortcut in South Hyrule Field. If you head up a screen there are a pair of treasure chests that you may have already opened. In any case, head up the staircase. Walk up a screen and you’ll find Gregal here, the same old man that you saved from a Ghost earlier. (If you didn’t do the earlier quest, sorry, you are out of luck). However, if saved Gregal earlier and you speak to him now, he will give you the Light Arrow! These arrows are much more powerful than regular arrows.
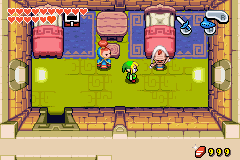
Climb up to the next floor and then head up a screen to find three treasure chests. Inside you will find two Blue Kinstones and one Red Kinstone. Collect them and then head up the staircase. Continue up a screen and open more treasure chest for more Kinstones.
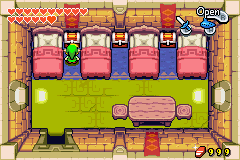
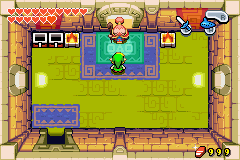
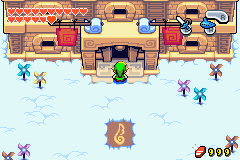
Speak with the Wind Tribe Elder known as Siroc. She already knows of Link’s deeds and tells him to travel to the top of the Tower where he will find the entrance to the Palace of Winds. Walk back down a screen and speak with Hailey, a member of the Wind Tribe that is blocking the door. After she moves out of the way, climb the steps to reach the top of the tower.
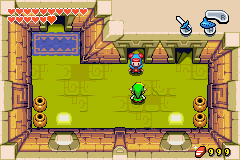
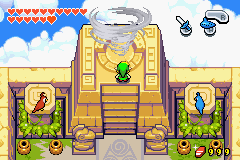
Walk northward and you’ll find another giant vortex. Step into the vortex and it will send you even higher into the Palace of Winds.
5.7 Palace of Winds
Once you enter the floating Palace, head up a screen and get rid of the Pesky Peahats. The crystal switches in this area will caused bridges to extend and collapse. Hit the crystal switches and make your way across three of the bridges. You’ll then need to use the Boomerang or the Bow and Arrow to hit a crystal switch, extending the northern bridge across the gap.
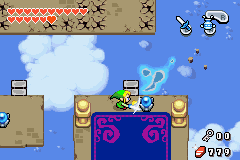
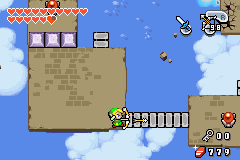
There is a block on the left side of the platform here. Push it southward, causing it to fall off the ledge, allowing Link to easily hit the distant switch with a projectile. Cross the bridge and defeat the Stalfos to the right. Use the tiles to multiply yourself and then quickly run across the bridge. Push the large block northward and head up a screen.


Wait for the moving platform to come to you and ride it northward. You’ll encounter more Bombarossa that will explode when touched. Either hit them with a projectile, or quickly run around them. You’ll have to maneuver around the stationary blocks and Bombarossa to reach the top of the screen. Climb up the platform and head left a screen.
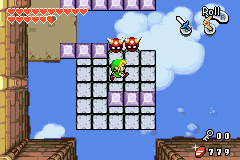
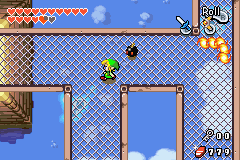
Defeat the Stalfos if you’d like and then quickly run across the cracked floor. There are some Bob-ombs and Winders on this grating so be careful. There is a treasure chest at the north end of the room, but we cannot quite get it yet. Avoid the enemies and head left a screen.
Use a projectile to hit the crystal switch to the south, extending the bridge across the gap. Watch out for the rolling spike and the floor spikes. Hit the switch again and cross the bridge to the west. You’ll have to hit the crystal switch again. You can do this by tossing a bomb and quickly running across the bridge, so it blows up after you make it across. If you have the Remote Bombs, this is considerably easier. The Magical Boomerang can also be used from a distance. Afterwards, cross the new bridge and head up.
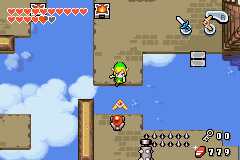
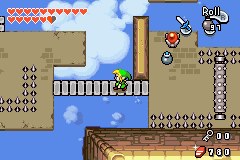
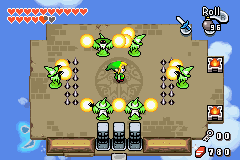
You will encounter a few waves of Green Wizzrobes. These wizard enemies will appear and shoot a fireball in a straight line in front of them. They will disappear and reappear at other parts of the room. Using your sword works fine in defeat these enemies. At first there are two of them, but then there are four in the second wave, and six in the third wave. After they are all defeated, open the large treasure chest to get Roc’s Cape!

Roc’s Cape allows Link to jump and temporarily float in the air. This will allow him to jump over large gaps. Use Roc’s Cape to jump over to the platform to the right. There are clouds heading upwards, but first, let’s get that one treasure chest that alluded us earlier. Go right a screen and make your way to the north part of the grating. Jump onto the door, causing it to flip over, sending Link to the lower platform. Open the treasure chest to get a Red Kinstone. Jump back onto the grating and head west a screen. Use Roc’s Cape to jump on to the clouds and continue upwards to the higher level.

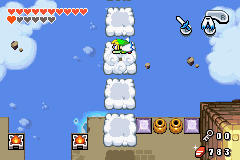
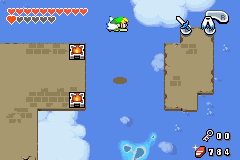

Watch out for the Crows and Blue ChuChus found here. Use Roc’s Cape and jump over to a series of platforms on the right, watching out for the Bombarossa along the way. Push the blocks out of the way to reach the flashing tiles. At the bottom part of the screen there are four switches. What you need to do is make multiples of Link and hit the switches at the same time. Stand slightly above the gap in between the switches and perform a sword slash to hit them all at once. Several Spiked Beetles will appear, so use the Cane of Pacci to defeat them and then head right through the door.

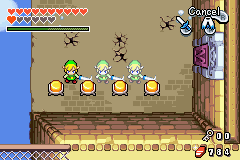
There are some propellers blowing wind to the right, so be careful not to get blown off the ledge. Wait until the wind stops blowing and run northward. At the top of the screen, use Roc’s Cape to leap across the gap. Carefully avoid the wind and head down. There are more propellers here, and you’ll see a small hole. When it is clear, use the Cane of Pacci on this hole. Then where there is no wind, run across to the hole and have it launch you up to the higher ledge. Continue westward to the next screen.


Jump onto the panel to get down to the lower area. Watch out for the Rupee Like and then jump back up the other nearby panel. Carefully jump down the panel here so that you’ll land on the moving platform. Ride it to the left and then jump up another panel. Head up and use Roc’s Cape to jump up the clouds to reach the next floor.
Jump over to the right and multiply Link using the tiles. Walk onto the moving platform and then stay along the right most part of the platform so that you avoid the blocks. Quickly run to the left and use the multiplied Links to move around the large block to the left. If you don’t make it in time, just jump off the ledge to the top and start over.
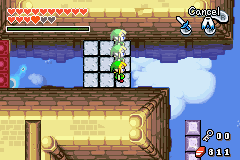
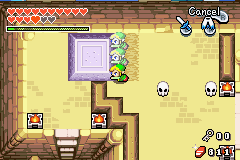
The three blocks on the right can be pushed down. Do so and walk onto the moving platform. Quickly use Roc’s Cape to jump over to the moving platform on the left. As the platforms move down, you’ll have to jump to the right, to the left, and to the right once again, all while avoid the Crow enemies. Once you reach the platform, jump up to the top of the grating and head right.
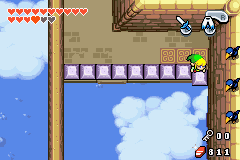

Use the moving platform and jump above and below the grating to get past the obstacles. On the next screen, jump down below the grating. Watch out for the spiked roller at the top of the screen. You’ll need to use the Cane of Pacci on the rightmost hole and have it launch you up to the higher area to the right.
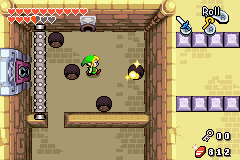

To the right you’ll find some tiles as well as three switches. Multiply link using the top-left, bottom-left, and bottom-right tiles. Perform a sword slash to hit all three switches at once, causing a stone to appear. Using it to shrink down in size.
As a Minish, go down through the small hole where you’ll find a ton of pots. Push the first one down so it falls off the ledge and then the next one to the left. The trick here is try to avoid pushing pots to the left, and instead, just push them up or down whenever possible. Match the pots in the picture and continue through the hole to the left. Make your way northward and avoid the spiked roller once again, going through the small whole at the top.
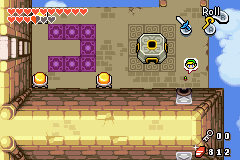
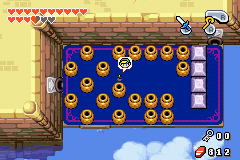
Travel north a screen and use the stone to revert back to the normal size. Head back down a screen and use a projectile weapon to hit the switch to the left, causing a small key to drop and the door to open. Grab the key and head through the opened door.
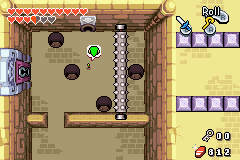
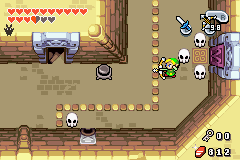
Use Roc’s Cape to jump over the gap and then head down a screen. Make your way back to the left and use the small key we just got on the locked door. Use the clouds here to jump up to the higher level of the Palace.


Defeat the Moblins if you’d like and then head left a screen. Watch out for the fans as you cross the bridge. Use Roc’s Cape to jump over the large gap. There are a few blocks here, so push one block to the left and another to the right to get by. Continue to the right, jumping over the spikes, while avoiding or defeat the ChuChus.

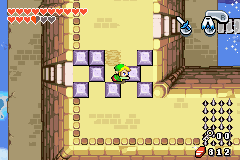
There is a large gap here and a fan that blows wind. Use Roc’s Cape while the wind is blowing and you can fly like the wind! Leap over this massive gap to land safely on the far left of the screen. Once you land, walk up a screen.
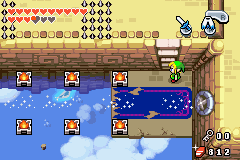

Jump over the gap, being careful of the crumbling floor below you. There is a series of Lakitu enemies found here. You can just avoid them, or defeat them by using the Boomerang or the Gust Jar. Climb up the steps and head up a screen.

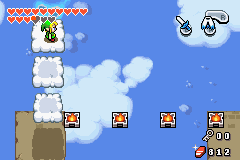
There is a large gap to the right and it might seem like it’s a bit too long of a distance to jump over. Climb the three clouds and from up top here, use Roc’s Cape and glide over the large gap. Walk up the steps at the bottom and defeat the Moblin archers found here. Go ahead and open the treasure chest to the right to find a Blue Kinstone.

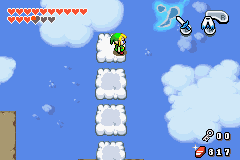
There is a Piece of Heart found here, but you cannot quite reach it from here. We’ll get it in just a little bit. Use Roc’s Cape to fly over to the clouds and then climb up to the top of this group. Glide across the gap to the right to find some more clouds. Use these clouds to climb up to the higher level of the Palace.
Watch out for the skulls nearby as a few of them will turn into Stalfos as you draw closer. Defeat them if you’d like and then head down a screen. In this room you will encounter two Ball and Chain Soldiers. The best way to defeat them is to use Roc’s Cape to jump over them and then deliver some sword slashes. Each of them will drop a Big Green Rupee when defeated, and once both are gone, a Small Key will appear. Grab it and go through the door to the west.
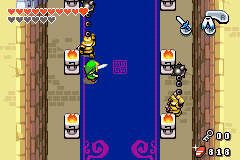

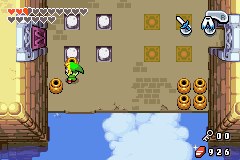
You’ll see a Treasure Chest in this room, but we cannot quite get it yet. Instead, continue onward to the room to the left. There are four tiles and four switches here. What you want to first do is lift the three outer pots from the bottom-left part of the screen. Then push the fourth pot onto one of the switches. Now use the tiles to create multiple Links, allowing you to step on the three remaining switches. With the door opened, continue onward to the next screen.
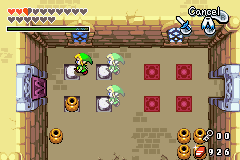
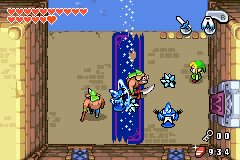
Walk to the left side of the room and step on the switch, causing the fan to start blowing wind. Use Roc’s Cape alongside the wind to launch yourself southward across the massive gap. Try to leave the room and the door will close behind you. Two Moblins and two Ice Wizzrobes will appear. You’ll have to defeat all these enemies before you can continue through the door. Use basic strategies to defeat them and continue onward to the next room.
You’ll encounter some Red Stalfos here, which will toss bones at you. You can then stun them with your Boomerang, before you jump over the gap, but then continue onward to the next room. Step on the floor switch and use the wind to launch you back to the north end of the room. Push the block to the left, allowing you to open the treasure chest and get a Small Key! Push the blocks on the right to get through and then use the Small Key on the locked door above.

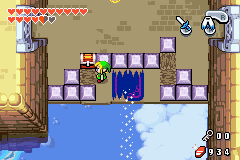
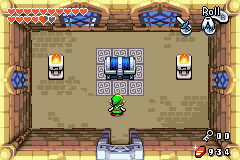
Open the big treasure chest here to get the Big Key! Walk down a screen, right a screen, and then use the Big Key on the large locked door to the south. Break the skulls here to grab some heart pieces. If you look at the ground, an arrow is point southward. Take a leap down and you’ll fall to a platform in the Sky.
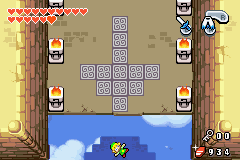
You will encounter a Red Darknut here. You can now use your Roc’s Cape against this foe. Wait for him to attack and then leap over him, deliver strikes while he is vulnerable. The trick here is to just jump over him, don’t jump and hold the button, as the glide will cause Link to take too long to drop back down to the ground. A simple jump can make it over the Darknut.
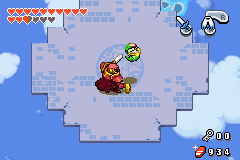
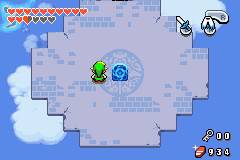
After the Darknut has been defeated, grab the Kinstone that is left for you. A blue warp portal will appear and a bridge to the north will extend. Travel across the bridge and head inside.
This indoor area is dark, so be sure to pull out your flame lantern. You can defeat the Red Stalfos and Gibdos that are crawling around if you’d like. Climb the steps on the right side of the room to find a big treasure chest containing the Compass. Afterwards, climb down the staircase on the left side of the room.

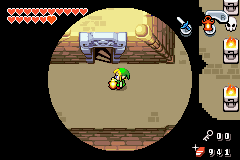
Avoid the enemies and head up a screen and then right a screen. Fall down the hole in the center of the room and you’ll land back on the higher platform from the floor below. Open the treasure chest found here to get a Small Key. After getting the treasure chest, once again climb up the stairs on the left side of the room.


This time head down a screen and defeat some of the peahats found here. Clear the skulls on the tiles and make multiples of Link, using the far left, middle, and far right tiles. Carefully walk down between the pillars to reach the four switches below. Stand in between them and slash your sword to hit them all at once. Go through the door that opens up to the left.
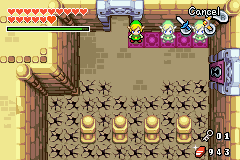

Use Roc’s Cape to jump over the Rolling Spikes and open the treasure chest at the end of this area to collect a Small Key. Take the quick shortcut to the right and then jump off the ledge. Use one of the two small keys you go and head right a screen.
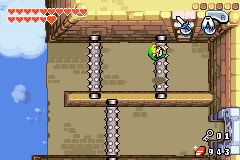

Use Roc’s Cape and jump over to the whirlwind below. Use a series of these whirlwinds to make your way northeast to the safe landing spot, while watching out for the Bombarossa that block your way.
Defeat the gibdos if you’d like and then head up the staircase. You can optionally head left a screen and fall down the hole. This will lead to a room that has two Wizzrobes, and if you defeat them, a treasure chest will appear containing a Red Kinstone. Afterwards, head right a screen and walk up the staircase once again.


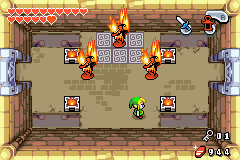
This time walk up a screen and left a screen to find a room where you’ll encounter three Fire Wizzrobes. Defeat all of the Wizzrobes and open the large treasure chest to get the Dungeon Map. Continue to the left a screen and defeat the Floor Masters found here. Pull the lever and the door will open up, so head on through. Continue up the staircase found here to get back up to the 4F.

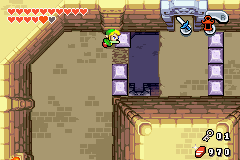
Defeat the enemies here if you’d like and then head to the left side of the room. Push the blocks down into the abyss and then jump over the gap. Walk up two screens and you’ll get all the way back to Piece of Heart #37 that we found a lot earlier in the dungeon! Grab it and then head back down two screens. Fall down the hole to the left and then make your way back up to the 4F.
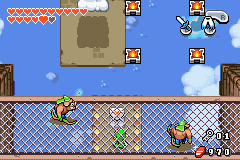
Just to the right you’ll find a Bombarossa, as well as some cracked blocks on the right. The trick here is you want to hit the enemy with a projectile, while it is near the cracked blocks so that they blow up. Jump over the gap and defeat the enemies found here. At the top-right corner of the room, you can light the two torches, creating a red warp tile that takes you back to the dungeon entrance.
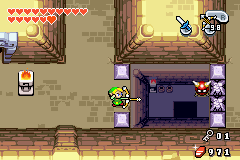
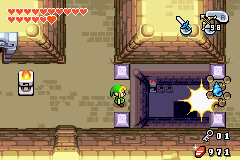

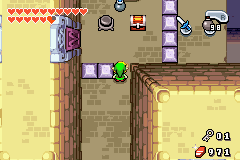
Just to the left of the Red Tile, you’ll find a treasure chest next to a switch. You can toss a bomb to hit the switch, or just use the magical boomerang to hit it, causing the door to the left to open up. You can make your way back to the left side of the room and head through this door to reach a treasure chest containing 200 Rupees! Then head to the southeast corner of the room and use a small key to unlock the door.
Defeat the Gibdos in this room and then use a bomb to blowup the cracked wall on the right. If you are out of bombs, there are some in the room just to the north. In this outdoor area there are several enemies and you can just avoid them. Place a bomb against the wall at the top-left part of the room and it will blow open a hole, so head on through.

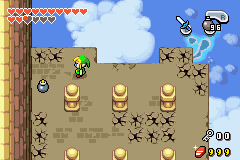
Blowup the two cracked blocks and then head up a screen. There are tons of Bombarossa in this room and if you touch almost any one of them, it will trigger others to go off, hitting the switch and closing the door. So you must carefully walk around the room, or just use Roc’s Cape to jump over them. Push the two blocks out of the way and head up a screen.
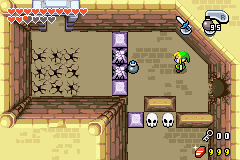

Open the treasure chest found here to get a small key. With the key in hand, head back down two screens. There are plenty of cracked blocks on the ground. Just stand on one of them and fall down to the floor below. Use that small key on the locked door and head up a screen.


There are tons of enemies in this room and you can avoid or defeat them if you’d like. There is also a treasure chest in the center of the room and you can access it by pushing the block just below it to the right, to acquire the Blue Kinstone. The skulls at the top-middle part of this large maze contain some hearts and a fairy, so be sure to fill up. Make your way to the southeast corner and push the blocks down into the abyss. Jump over to the right side of the room and then head up. Jump to the island platform to the right and climb up the clouds.
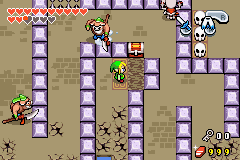

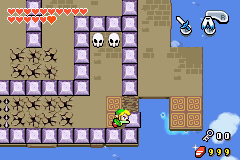

In the room to the right there is a treasure chest containing a Red Kinstone. Grab it and then head back left a screen and fall back down. Jump to the left and jump up the clouds found here. Use the Big Key to head through the large door. Break the skulls for some recovery hearts and then head up the vortex to take on the dungeon boss, the Gyorg Pair.


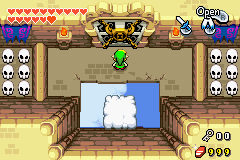

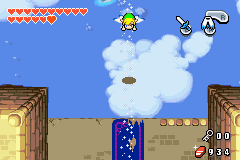
The battle takes place in the air on top of the Gyorg Pair. Jump onto the red Gyorg and a trio of eyes will appear. Multiply Links using the tiles and hit the eyes simultaneously with your sword. Repeatedly hit the eyes until the Red Gyorg starts smoking. At that point use Roc’s Cape and jump onto the Blue Gyorg when it flies by.
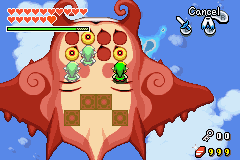

While on the Blue Gyorg, one of the eyes will appear, so quickly slash at it. Be careful though, as soon as you hit the eye, the Gyorg’s tail will whip around, in which you’ll need to jump with Roc’s Cape to avoid it. After several hits, jump back over to the Red Gyorg for the next phase of the battle.
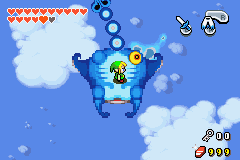

This time the Red Gyorg is turned to its side and during the battle, the Blue Gyorg will come flying across. The Blue Gyorg will also shoot fireballs towards you, so be careful. Once again multiply Link using the tiles and slash at the eyes as they appear. Repeat this same process until you’ve hit the boss enough times, and then jump back onto the Blue Gyorg.


The second phase on the Blue Gyorg is identical to the first one, except there are now green mini-Gyorgs that fly by. Just slash away with your sword or avoid them. Once again jump over the Blue Gyorgs tail and slash at the eyes when they appear. After enough hits, jump back onto the Red Gyorg.
The third phase of the Red Gyorg is just like the previous two, except there are even more fireballs being launched at you. Repeat the same process and then jump back onto the Blue Gyorg. This time it moves a bit more randomly and Green Gyorgs appear more frequently. Once again slash away at the eyes until this form has been defeated.
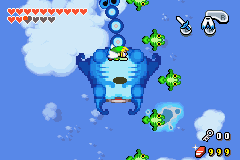
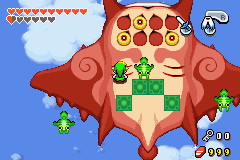
The final phase on the Red Gyorg is more of the same, just more Green Gyorgs will fly by more frequently. Carefully defeat them and slash away at the eyes to finally defeat the Gyorg Pair.

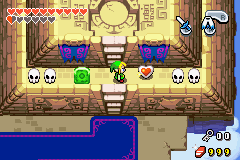
After defeating the boss, Link will automatically collect the Wind Element! Grab the Heart Container to the right and then step into the green portal to get back to the Tower of Winds.


